Introduction
Welcome to the elite unit of the Iratan Starship Fleet — the Iratan Star Riders. Although you may have several thousand hours of flight time — there are, after all, minimum requirements — before you can be allowed to pilot an actual Star Rider elite domination fighter, you must first engage in this high-accuracy simulation, the XSR1.
In the simulated mission, a hypothetical galactic empire, the Nyloz Regime, has broken its treaty with the Irata Federation. Technically, there is a state of war between the Nyloz Regime and the Irata Federation. The menace of the Nyloz Regime threatens to eliminate all human colonies in the galaxy.
Your orders: Eliminate the Nyloz threat using a sole Star Rider domination fighter. In order to pass this evaluation, you must be able to achieve the rank "Star Commander Class 1" at the "Commander" mission level.
Nyloz Empire Information
The simulation includes three major classes of Nyloz craft:
- Nyloz Fighter – fast and aggressive, deadly at close range.
- Nyloz Cruiser – these avoid close combat, but are tough oponents when approached.
- Nyloz Basestar – top-of-the-line craft, combining speed and aggression of Nyloz Fighters with shields exceeding that of Nyloz Cruisers.


The Nyloz will avoid contact unless you enter a sector with Nyloz ships. While you are engaged with a Nyloz force, the rest of the Nyloz navy will surround and destroy Irata starbases, which are your military support base.
During combat you will be concerned only with the Nyloz craft occupying the sector you're currently in. You have the capability to "hyperwarp" to any sector at any time. Any Nyloz craft you destroy will remain destroyed for the remainder of the simulation.
Ship Information
The Star Rider domination fighter has an improved version of standard repulser shields, capable of greatly reducing damage done by standard photon missiles. The Star Rider also has two photon torpedo tubes, each capable of fore and aft firing directions.
Each Star Rider has Twin Pulsed-Ion Engines with Afterburner capability. Afterburners are automatically engaged when travelling above the rated cruise speed of 12 metrons per second.
Star Riders integrate full hyperwarp capability with Distributed Hyperwarp Struts. These hyperwarp struts are part of the basic core and structure of the ship. Unlike most craft, Star Riders cannot lose hyperwarp functionality unless the whole ship is destroyed. The drawback is that loss of energy is sufficient condition to cause misalignment of hyperwarp struts and destruction of the fighter, so always ensure that your fighter has sufficient energy for continued operation.
Star Riders use standard docking protocols for starbases. Star Riders use a module system that allows complete replacement of damaged modules, greatly reducing time needed to replenish energy and repair fighter components. Starbases, on recognizing your fighter, will automatically dispatch a repair bot carrying all modules of your ship.

Simulation Information
The XSR1 simulation has four mission levels:
- NOVICE – 3 starbases to protect, eliminate 27 Nyloz ships, shields cannot be damaged or destroyed, hyperwarp auto-tracking enabled.
- PILOT – 4 starbases to protect, eliminate 36 Nyloz ships. At PILOT level and above, shields can be damaged or destroyed, and hyperwarp must be tracked manually.
- WARRIOR – 5 starbases to protect, eliminate 45 Nyloz ships.
- COMMANDER – 6 starbases to protect, eliminate 54 Nyloz ships.
Primarily, your mission is to destroy all Nyloz starships. Do not allow them to destroy your fighter, and minimize the damage done to your craft. Secondarily, complete your mission in as little time as possible, with minimal energy usage, and without letting Iratan starbases to be destroyed.
Direction Control
On a standard keyboard, the arrow keys are mapped to the Star Rider's Direction Control Pad. Ensure that your keyboard is positioned such that access to these keys is comfortable and natural.
Direction Control Pad
In keeping with official fleet jargon, your keyboard's arrow keys will henceforth be referred to as the Direction Control Pad. Pressing the up button on the Direction Control Pad causes your Star Rider to dive, while pressing the down button causes your Star Rider to climb. Pressing the left button turns your ship to port (left side of the ship facing forward). Pressing the right button turns your ship to starboard (right side of the ship facing forward).
These directions apply to the front view of the ship. When using the aft view, directions are reversed.
Control Keys
The Star Rider controls are mapped onto a standard keyboard. These controls mimic the operation and location of actual control buttons on a Star Rider fighter.
| 0-9 | Twin Pulsed-Ion Engine Control. Also aborts hyperwarp. |
| A | Aft View |
| C | Attack Computer Enable/Disable |
| F | Fore View |
| G | Galactic Chart View |
| H | Hyperwarp Engines Engage/Disengage |
| L | Long-Range Scan View |
| M | Manual Target Switching |
| S | Shield Enable/Disable |
| T | Auto-Tracking Enable/Disable |
| P/[Esc] | Pause Simulation |
In addition, the space bar serves as your Photon fire button. Holding the space bar down causes your simulated Star Rider to fire at maximum rate.
Twin Pulsed-Ion Engines Control (0-9)
The Twin Pulsed-Ion engines are used to maneuver your Star Rider within a sector while pursuing or evading the enemy. Use these keys to select the velocity or speed at which your domination fighter travels. The corresponding speed is displayed as the V: indicator on your panel.
Your ship always moves forward. The optimum cruise speed is key 6 (V: 12). Nyloz starships have a maximum speed slightly less than 7 (V: 25).
| 0 | V: 00 |
| 1 | V: 00 |
| 2 | V: 00 |
| 3 | V: 01 |
| 4 | V: 03 |
| 5 | V: 06 |
| 6 | V: 12 |
| 7 | V: 25 |
| 8 | V: 37 |
| 9 | V: 43 |
Aft View (A)
Shows view of space behind your fighter. When in this view, photons are fired backwards.
Attack Computer Enable/Disable (C)
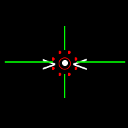
Enables or disables the Attack Computer. The Attack Computer projects crosshairs in the Fore and Aft View. It also predicts the approximate visible location of objects beyond normal human viewing range, and projects a spinning cursor in the predicted location.

Whether or not the Attack Computer is enabled, your on-board Instruments Computer will update the vertical (θ:), the horizontal (Φ:), and the range (R:) indicators on your panel to match the readings from your instruments. These indicate the position of attacking Nyloz starships and allied starbases in the same sector relative to your Star Rider.
The Attack Computer is capable of locking on to your opponent. Lockon will enable if the Attack Computer is enabled and working, your target is centered in front of you, and you are near the target. If you fire while locked on, both photon tubes will fire and the photons will track the target automatically. The Attack Computer's targeting cursor and direction indicator will become red when locked on.
Front View (F)
Shows view of space in front of your fighter.
Galactic Chart View (G)
The Galactic Chart is a vital tool in your mission. It gives you an overview of the sectors in the relevant octant of the galaxy under threat of Nyloz invasion. Sectors may contain a Nyloz starship group, a friendly allied Iratan starbase, or nothing at all.
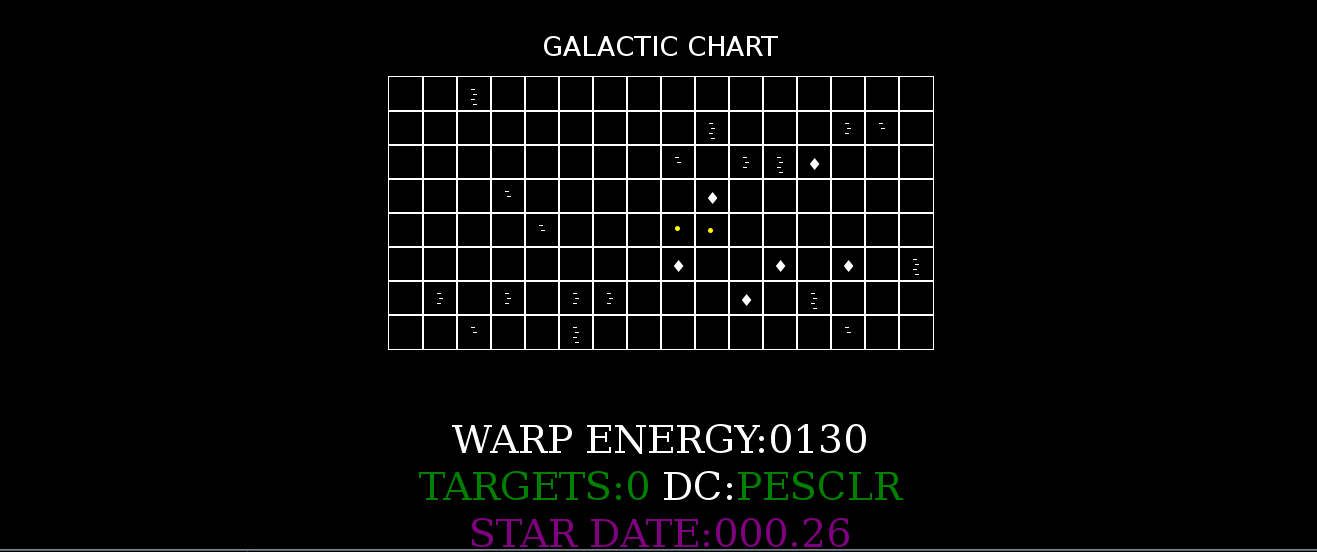
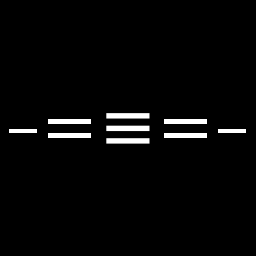
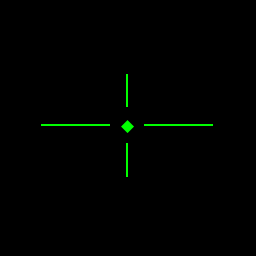
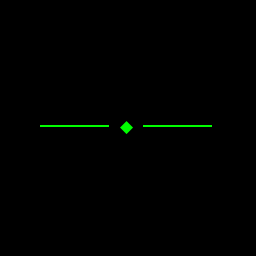
On the Galactic Chart, sectors with ♦ contain a friendly starbase where you can dock to repair and refuel your fighter. Sectors with lines contain a number of Nyloz starships.
There are also two yellow dots on the Galactic Chart. One of these indicates your current position, while the other dot (which you can control via the Direction Control Pad) indicates your hyperwarp target.
To travel to another sector, move the hyperwarp target dot to the target sector and then "hyperwarp" into that sector.
It is vital to your mission to frequently check the Galactic Chart. It not only indicates the progress of your mission to eliminate the Nyloz threat, it also shows enemy force movements. The Nyloz will move around the octant in an effort to surround and destroy starbases. Fortunately, the Nyloz will always focus on only one starbase at a time. They will not attempt to scatter to attack multiple starbases.
Groups of Nyloz starships move at different speeds based on their size. Groups of 1 or 2 ships move fastest. Groups of 3 move at half that. Groups of 4 move at approximately 1/8 the speed of groups of 1 or 2.
When a starbase is surrounded, you will receive a message via your Sub-Space Radio. You have about 2 minutes (to be precise 150 centons) to save the starbase. A starbase is surrounded if all 4 sectors directly beside it have Nyloz starship groups.
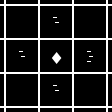
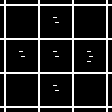

If an Iratan starbase is destroyed by the Nyloz, they will construct two new ships from starbase components. To prevent destruction of an allied Irata starbase, you must clear at least one sector beside it of Nyloz starships.
It is imperative to stop the Nyloz from destroying starbases. If all starbases in the mission have been destroyed, you will be considered as having failed the mission.
Aside from the enemy disposition, the Galactic Chart View displays additional information. As you move the hyperwarp target dot, the amount of energy needed to hyperwarp is displayed by the WARP ENERGY: indicator. In addition, the number of enemy targets that occupy the target sector is displayed by the TARGETS: indicator.
The STAR DATE: indicator shows the elapsed time during a mission. It is based on units called centons. The Nyloz will only move on a STAR DATE: ending in .50 or .00.
Finally, there is the damage control or DC: indicator. It's shown as DC:PESCLR. Each letter corresponds to various components of your ship.
| P | Photons |
| E | Engines |
| S | Shield |
| C | Computer |
| L | Long-Range Scan |
| R | Sub-Space Radio |
The status of each component is defined by the color of its letter. A green letter indicates a fully working component. A yellow letter indicates a damaged component while a red letter indicates a completely destroyed component.
The engines will still work even after they have been destroyed thanks to a backup pseudo-pulse system, although progress will be very slow. The shields will flicker when damaged, and if you are hit by Nyloz photons while the shield happens to have flickered off, your fighter will be destroyed. When the computer is damaged, coordinate information θ:, Φ:, and R: is not updated. When the computer is destroyed, no computer functions will operate. If the Long-Range Scan is damaged, it will show a mirrored image in addition to the normal image of the sector scan (see the section on Long-Range Scan).
Hyperwarp Engines Engage/Disengage (H)
You must engage hyperwarp in order to move from one sector to another. First, switch to the Galactic Chart View and use the Direction Control Pad to move your hyperwarp target cursor to the desired sector. Then turn to the Fore View and engage hyperwarp by pressing the 'H' key.
In NOVICE level, there is no need to steer while in hyperwarp. However, in PILOT, WARRIOR, and COMMANDER levels, you must steer in hyperwarp. When hyperwarp is engaged, a hyperwarp target marker is displayed on your front view.
Use the Direction Control Pad to keep the hyperwarp target marker centered as closely as possible. Enabling the Attack Computer will assist you greatly in determining the center. If you get too far out of alignment, you will end up in the wrong sector.
A red warning will be displayed if you enter a sector with enemy Nyloz starships.
The closer your cursor is to the center, the closer you will be to your target sector. You can abort hyperwarp by pressing any of the Engine control keys or by pressing 'H' again.
As hyperwarp will accelerate you into hyperspace, it can be used as a quick escape in emergencies as well as for travel through normal space if your main engines are destroyed.
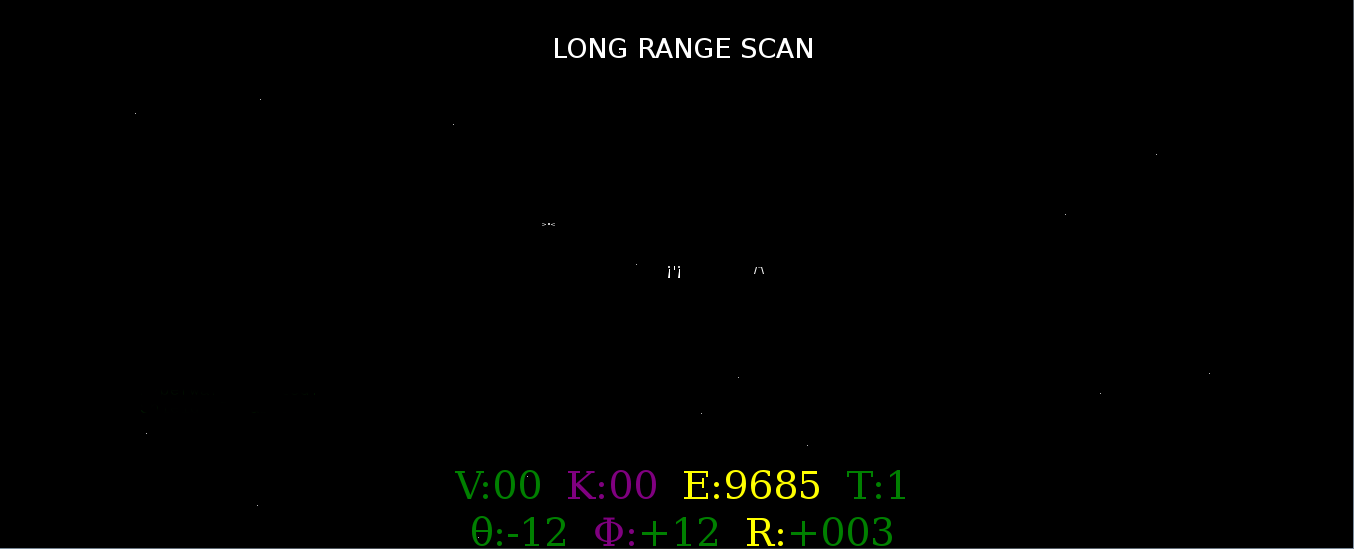
Long-Range Scan View (L)
Shows you a top view of the sector you are currently in. Your Star Rider fighter will be located in the center and all other objects in the sector rotate around it. Any Nyloz starships or starbases will be identified and appear in the Long-Range Scan.
A simple way to use the Long-Range Scan is:
- Select a target.
- Push the Direction Control Pad's left button (which causes all objects to rotate around you) until the target is directly in front of your fighter.
- Push the Direction Control Pad's up or down button so that the target is as far away from you as possible. Which you should press (up or down) depends on which one moves the target away from you.
- Use the engines to approach the target.
- Stop and make course corrections as you approach your target. Repeat steps 2 to 4 if necessary.
- When the target is close to your ship, stop the engines. The target should now be visible in the front view.
If you cannot find the target on the Long-Range Scan at all, and you know the target is immobile in the sector (for example a starbase or an evading Nyloz ship), use the following procedure:
- Push the Direction Control Pad's down button until you've performed a 180-degree turn, or you've located the target on the Long-Range Scan. Use the stars as a guide to how much you've turned.
- Push the Direction Control Pad's left button until you've performed a 90-degree turn. Again, use the stars as a guide. If a star is to your ship's right, for example, you know you've made a 90-degree turn if it ends up behind you. Try to make a precise 90-degree turn here.
- Push the Direction Control Pad's down button again, and make another 180-degree turn. The target should appear on this turn if it didn't already appear in the previous turnings.
- Once you've located the target, perform the previous procedure to approach it.
When the Long-Range Scan is damaged (but not destroyed), then you will also see a mirror image of everything scanned in the sector. One object will be a reflection. Select one image and attempt to move towards it. If it instead moves away from you, you have chosen the reflection instead of the actual target and should turn around.
Manual Target Switching (M)
Generally, up to two Nyloz will attack at one time. They are designated as targets 0 and 1, displayed as T:0 and T:1 on the panel. The computer will default to targeting T:0 until you eliminate it, then switch to T:1.
Pressing the 'M' key lets you switch between targets manually.
Damage to your computer may prevent it from switching targets automatically. You will need to use the manual switching in that case.
When tracking a friendly starbase, it is counted as T:0.
Shield Enable/Disable (S)
The Star Rider's Shield protects the fighter from destruction. When enabled, there will be a bluish tint to space. When disabled, space will be the normal black. The Star Rider will be destroyed by Nyloz photons if hit while the Shield is down.
The Shield does not perfectly protect the fighter from all damage. Ship components may still be damaged by incoming enemy fire. As the Shield itself is a component of the ship, this means you can still be destroyed in two hits: one to disable your shield, the second to destroy you. Avoid or shoot down incoming enemy missiles!
Auto-Tracking Enable/Disable (T)
When Auto-Tracking is enabled, your computer will automatically track the current target when it moves from behind you to in front of you, and vice versa, and switches automatically between Fore View and Aft View as appropriate. This is useful in higher difficulty levels, as the Nyloz can attack you from behind.
Note however that it is possible to be caught in a cross-fire with one Nyloz in front of you and another behind you. The Nyloz can then fire alternately, and the computer will automatically re-target the enemy starship that most recently fired. This can cause rapid switches in view.
Despite the above problem, many ace Star Rider pilots swear by Auto-Tracking. A particularly vocal few, however, have managed to achieve high kill rates even with Auto-Tracking disabled. It is thus kept as an option that may be enabled or disabled at the pilot's discretion.
Auto-Tracking starts out disabled. If you depend on it, remember to turn it on at the start of each mission.
Damage to the computer may prevent Auto-Tracking from working. You will then need to manually switch between Aft View and Fore View.
Pause (P/Esc)
Pauses the simulation. A small menu is shown, which allows you to resume the simulation or return to the difficulty level selection.
Control Panel Display
The control panel display, visible in the Fore View, Aft View, and Long-Range Scan View, displays information about your ship.
| V: | Velocity |
| K: | Number of Nyloz killed this mission |
| E: | Energy Left |
| T: | Target Selected |
| θ: | Horizontal offset of target |
| Φ: | Vertical offset of target |
| R: | Range of target from ship. Positive means front of ship, negative means behind. |
Sub-Space Radio
The Sub-Space Radio is the ship component that keeps your Galactic Chart up-to-date. When you select the Galactic Chart View, the Sub-Space Radio is automatically enabled to get the latest information on enemy ship movements. It is otherwise a passive component capable only of receiving high-power broadcast messages, particularly "STARBASE SURROUNDED" and "STARBASE DESTROYED" messages.
If the Sub-Space Radio is damaged, the Galactic Chart cannot be updated, but it is still possible to receive broadcast messages as well as make specific queries about the contents of specific sectors (i.e. the TARGETS: indicator will still work). However if the Sub-Space Radio is destroyed, no communications is possible.
Docking With Starbases
Starbases are your military support in addition to being assets under your protection. During your mission, you may dock at any starbase at any time to repair and refuel your fighter.
In order to initiate docking, you must have the starbase centered in front of you with a range R: indicator of less than +006, and with engines stopped completely (engine key 0).
Once docking is initiated, the starbase will dispatch a repair bot containing fresh Star Rider modular components and a full supply of energy. This repair bot is programmed to approach a fixed location only, so moving will abort the docking process.
Below is a general procedure for initiating docking. As you are likely to need docking if your fighter is damaged, make sure to also practice this procedure with Attack Computer off and using only the Long-Range Scan.
- Locate the starbase using your Attack Computer or Long-Range Scan so that it is directly in front of you.
- If the starbase is not within sight (range R: is greater than +120) set engines to key 6 (V:12) until the starbase comes into range. Make any needed course corrections especially if you are using the Long-Range Scan to locate the starbase.
- When the starbase is just within sight, drop your speed to engines key 5 (V:06) for easier navigation. Make any needed course corrections to ensure the starbase is centered.
- As you approach the starbase, drop your engines to key 3 or 4.
- When the starbase is very near, drop your engines to key 1 or 2 until your range is within R:+006 or less.
- Stop engines (engine key 0) and wait to be repaired and refueled.
Energy Consumption Rates
In addition to being judged by your mission completion speed, number of surviving starbases, and mission difficulty level, you are judged according to your energy usage during the mission.
Turning off components (such as turning off the Shield in a starbase or empty sector, or turning off the Attack Computer while docked or not attacking the Nyloz) is part of the standard strategy employed by ace Star Rider pilots to conserve energy. In addition, avoiding or shooting down incoming photons helps reduce energy consumption, since being hit with the Shield enabled drains your energy.
Some passive energy consumption is needed for life support and for maintaining the alignment of the Distributed Hyperwarp Struts. Loss of energy equates to destruction of the fighter, as misalignment of the struts will destroy the fighter's skeleton.
| Life Support and Alignment Maintenance | 0.25/second |
| Shield Maintenance | 2/second |
| Attack Computer | 1/second |
| Firing Photons | 10/photon |
| Incoming Photons Absorbed by Shield | 100/photon |
| Engines Key 0 | 0.0/second |
| Engines Key 1 | 1.0/second |
| Engines Key 2 | 1.5/second |
| Engines Key 3 | 2.0/second |
| Engines Key 4 | 2.5/second |
| Engines Key 5 | 3.0/second |
| Engines Key 6 | 3.5/second |
| Engines Key 7 | 7.5/second |
| Engines Key 8 | 11.25/second |
| Engines Key 9 | 15.0/second |
Tips by Ace Pilots
Photons
- Remember that you have two photon tubes! This gives you twice the firepower of a Nyloz ship. You can block incoming fire with one photon, then destroy the Nyloz with the next. Think of it as a left-right punch!
- Photons, to some extent, can be steered after firing. Turning your ship will also turn the photons, slightly, in that direction.
- Your photons have a range beyond your normal sight range. Use your Attack Computer to help you shoot the opponents you can't see.
- The Nyloz can shoot at you before you even see them. So do the same to them: shoot them before they even see you!
Engines
- If your engines are shot out, your Hyperwarp can work as a burst-type engine. Just make short bursts of hyperwarp and make sure to abort before entering hyperspace.
- The official manual says the best cruise speed is engines 6, but that's with Shield and Attack Computer off. I did the math, and if both Shield and Attack Computer are enabled, the faster engines 7 and 8 settings reduce the total energy spent to travel a fixed distance.
- Keep travelling at engines 6, and some nasty Nyloz will bait you along, running at the same speed and keeping their distance far away from you until another Nyloz joins the attack behind you. Get to the higher speeds, you want to clear the sectors fast.
- Once the Nyloz engage you, it's actually better for you to turn off your engines. So what if you're a literal sitting duck? Your Shield can take their fire and you got two photon tubes. The Nyloz like to sit beside you while you're cruising, only to swoop in for a surprise attack. Turn off the engines and you'll surprise them.
Shield
- Like the fleet manual says, without the Shield, you're one shot away from death. And with the shield, you're, at worst, two shots away. Keep that in mind. See a photon? Duck!
- The Shield is powerful, but it's an energy hog. If you're safe and you know you're safe, turn it off.
- Keep an eye out for your Shield getting toasted! When that happens, Hyperwarp out immediately. Turn away from the enemies to make it harder for them to hit you, but don't turn your back on them completely or they'll hit you from behind. Just turn away quickly then get back on course when you've moved past your opponents.
- Remembering that being hit with the Shield enabled loses you 100 energy, but shooting a photon to stop the incoming enemy photon will cost you only 10.
Computer
- The numbers at the bottom of the panel indicate the position of your target. Learning to "fly by instrument" is important if your computer is damaged and your long-range scan is destroyed.
- While very useful, the Attack Computer can only indicate one target at a time. It might not choose the nearest target. So remember to use the M key to quickly check distance to the possible targets.
- Auto-tracking with the T key is a very important ability of the Star Rider. It saves you that vital fraction of a second to manually press F or A yourself. It can get mildly confusing in a tight firefight, but you practice can get you used to it.
Galactic Chart
- As you enter an enemy-occupied sector, you're moving too fast to be hit by Nyloz. Use this "grace period" to quickly bring up the chart and move your hyperwarp target to a nearby starbase. It can save you a few precious seconds when you quickly need to get out of a pinch!
- While chasing down distant Nyloz, remember to quickly flash the Galactic Chart to update it. This is important in case your Sub-space Radio gets damaged in the subsequent fight.
- When a base is surrounded and you've just cleared off one sector beside it, check if the nearby sectors have small, fast Nyloz groups. It may be better to stay in the cleared sector to keep the base from being surrounded again. Remember, the Nyloz won't engage you in combat!
Online Resources
XSR1
1979 Atari Star Raiders
- Star Raiders Trivia, by the author of the original game himself, Doug Neubauer.
- Gamasutra article
- Bill Kendrick's Star Raiders Tribute Page!
History of the XSR1 Game
I pretty much inherited my father's Atari 800XL, and started learning programming on the excellent Atari Logo system. I started programming maybe in 1993. In addition, the Atari 800XL was my main gaming computer, and two of the best games I'd ever experienced were the two Star Raider games; the first Star Raider for gameplay, the second for excellent graphics.
In around the early 21st century, sadly, that Atari 800XL was on its last legs. The Atari 1050 Floppy Disk Drive that came with it was beginning to growl funny, and the Atari 800XL's keyboard was starting to not detect pressed keys. Opening the machine revealed that the flexible PCB that was the keyboard's base was beginning to oxidize and decay. The guiderails for the 1050's disk head were getting rusty. In time, I would no longer be able to actually utilize the machine and its mechanical peripherals.
That's when I hit upon the rather amazing idea to write an HTML+Javascript implementation of the first Star Raider game.
(mind you,
this was before HTML5 was even a glimmer
in anyone's eye,
and hence no <canvas> —
and no fancy Star Raider II graphics)
So I opened my WinXP box
(I hadn't transitioned to a full GNU/Linux system
as yet then)
and started hacking together
XSR1.html.
As all the HTML, CSS, and Javascript
was in a single file,
it quickly became unwieldy.
I was able to implement the stars,
the engines,
the shield,
firing photons,
and starbase docking,
but not the enemies,
attack computer,
or the galactic chart.
This was some time in the early 2000's.
Eventually, I lost interest in that particular implementation. Sadly, I can no longer locate that version — it is probably much more accurate to the original Star Raiders, since I could still run and operate the game on the Atari 800XL side-by-side with the HTML+Javascript version to compare.
Time passed, and while Javascript didn't really change all that much, attitudes toward it did change. In particular, the rise of NodeJS and CommonJS begat the Asynchronous Module Definition (the foremost implementation being RequireJS).
I'd always known that the main failing of XSR1.html
had been the lack of proper modularization
of the game.
Armed with RequireJS,
I reimplemented XSR1
into a holding HTML file,
a support CSS file,
and several Javascript files;
the version you are now playing today.
Legal Information
Copyright © 2014, 2015 Alan Manuel K. Gloria.
This game and its documentation are free software: you can redistribute it and/or modify it under the terms of the GNU General Public License as published by the Free Software Foundation, either version 3 of the License, or (at your option) any later version.
This game and its documentation is distributed in the hope that it will be useful, but WITHOUT ANY WARRANTY; without even the implied warranty of MERCHANTABILITY or FITNESS FOR A PARTICULAR PURPOSE. See the GNU General Public License for more details.
You should have received a copy of the GNU General Public License along with this program. If not, see <http://www.gnu.org/licenses/>.